Have you ever considered producing an ebook for your blog readers? In this comprehensive post Ali Hale breaks down the process of how to do it.
There’s never enough time. In an ideal world, you’d be posting to your blog frequently, writing great guest posts, building relationships with other bloggers, and responding to every single comment … and all that’s more than you can manage. You might have considered writing an ebook as a companion to your blog, but you just can’t find the time or the energy for it.
You already know all the reasons to do it: you’ve downloaded your share of free ebooks from other blogs, and you’ve seen that:
- Free ebooks can be used as what Sonia Simone calls “cookie content”, to entice newsletter sign-ups
- Free ebooks can be a great traffic draw: they get twittered about and linked to
- Just having a free ebook available on your site will subtly shift readers’ perceptions: they’ll see you as one of the “big guys” of the blogging world
But, of course, an ebook is harder to create than a blog post. A 25-page ebook is 4,000 words or more; you have to edit and proof-read carefully (once people are emailing that ebook to one another, you can’t fix that embarrassing typo or broken link); you’ll need PDF and ebook cover software if you want it to look professional; you have to launch it with a bang…
Writing an ebook isn’t an easy undertaking, and it’s something a lot of bloggers never do. That’s why, if you do write a high-quality free ebook, you’re going to stand out.
Here’s how I wrote, published and launched my free ebook in just thirteen hours and how you could do the same. My time broke down like this:
- Writing an outline: 30 minutes
- First draft of content: 4 hours
- Adding some graphics: 1 hour 30 mins (mostly my boyfriend’s work!)
- Redrafting and editing, inserting all links: 3 hours
- Appendix of resources: 1 hour
- Creating a cover: 1 hour 30 mins
- Converting to pdf: almost instant!
- Final proof-read and link-checking: 15 minutes
- Launching and spreading the word: 1 hour 15 minutes
I spread the tasks above across four days: I’m a freelancer so my schedule’s quite flexible, but I do have to do a bit of paying work once in a while!
And here’s your 13-step guide to doing the same:
Step 1: Get an Idea
You need a clear concept for your ebook. An ebook isn’t a blog post – but it’s not a blog either: don’t make it a general overview of your niche (especially if it’s quite broad). Pick one category from your blog, or a topic which would make a series of blog posts.
I’d wanted to create a free ebook for a while, but it was one of those things I thought I’d get around to “when I have a bit more time”. Then I came up with an idea for a mini-series of two linked posts (Reframing Work #1: Ditching Drudgery and the Conventional View of “Work” and Reframing Work #2: Min Hours, Max Cash – or Do What You Love?) which would lead very naturally to the ebook (Quit Your Day Job). I decided I was going to go ahead and launch it, a week after the first post in the series. This led to…
Step 2: Tell Your Readers
Tell your readers that you’ll be bringing out a free ebook in a week or two weeks’ time. It’s amazing how a deadline – and public accountability – can motivate you!
You might want to make the announcement in a post, on Twitter, or to your newsletter list. Communicate a sense of excitement: tell readers you have a “treat” or “goodies” coming up. This is part of the pre-launch process of getting a buzz going. I personally find the word “freebie” can have a bit of a connotation of something cheap and rubbishy – but you might think differently!
Step 3: Write the Outline
If you write long blog posts, you might already be in the habit of outlining before you begin. With an ebook, this is crucial: you don’t want to write for hours only to find you’ve wandered far off-topic. Neither do you want to sit staring at a blank screen, wondering what you’re going to say next.
Open up a blank document or sit down with a piece of paper and write an outline before you go any further with your ebook. Everyone has different ways of doing this, but one which works well for me is:
- Spend five minutes mind-mapping: write down your ebook’s title or theme in the centre of a piece of paper, then jot down all the points that come to mind
- Eliminate any points which are too broad for the ebook’s scope. Order the rest in a logical sequence (I just jot a number next to each)
- Type or write out the list in order. These are your subsections or chapters in the ebook.
- Jot down at least two bullet points for each section, or a couple of sentences: these are the main points you’re going to make. Sometimes, you’ll want subheadings within each section.
- If you think of a great idea for a graphic, or a resource (book, blog, etc) to recommend, write that down here too.
It might sound complicated, but if you sit down for an uninterrupted half-hour, you can easily get a complete outline written.
Once you’ve got a list of sections and subsections, think about roughly how long each will need to be. Aim for a total of around 4,000 words: this is about right for a 25-page ebook set in a large font: I like 14 pt Calibri (Word 2007) or 11 pt Verdana.
Step 4: Draft the Content
This step is the one which many bloggers find daunting – writing enough words to fill an ebook. If it seems overwhelming, try thinking about your ebook as a series of linked blog posts (with each subheading starting off a new post). Your outline really helps here, because it breaks writing your ebook into manageable chunks.
And these four tips should help too:
First: Get Rid of Distractions
It’s crucial that you avoid distractions while you’re writing. That means keeping away from emails, Twitter and Facebook till you’re done. You don’t need to write the whole ebook in one go – but try to give yourself a block of at least two hours to work on it, or set yourself the goal of drafting a certain number of sections.
If your family or housemates are likely to interrupt you, try heading off to a coffee shop or library for a few hours.
If you find it hard to concentrate, try using a full screen text program (I like Dark Room), or switch off your internet connection!
Second: Don’t Edit As You Write
This is your first draft, so forget any worries about the quality of your writing. Don’t keep editing sentences to try to make them perfect – just move on. You can come back and rewrite later: your current task is simply to get a complete draft down.
Third: Don’t Stop to Look Things Up
Don’t stop to look up links, quotes or statistics that you want to include. Just make a note to yourself in the body of the text. I tend to enclose these in square brackets [like this]. Stopping part-way through a paragraph or sentence breaks your flow … and it’s very easy to start looking up one quote and get distracted!
Fourth: Don’t Format While Drafting
Your finished ebook is going to be a visual masterpiece, with a cover page, section headings, subsection headings, bold text, italic text, lists, maybe tables and specially-formatted blockquotes…
Your first draft, however, should have few or none of these. It’s easy to get distracted with formatting, and it’s also inefficient to format before all the text’s written – you’ll find yourself changing a lot of things around.
Keep your formatting to a bare minimum while you’re drafting. You might find it useful to format headers and subheaders (make sure you know how to use styles in Word – don’t edit each header separately) – but the rest can wait.
Step 5: Add Any Graphics
Once the draft is complete, add any graphics that you want to include in your ebook. The type of graphics you use will depend on the topic of your ebook, but you might want to consider:
- Charts to show statistics in a visual, instant way
- Diagrams to explain complex concepts
- Illustrations or photographs to complement the text
- Small graphics to highlight tips, warnings or quotes
Don’t make the mistake of just using pictures to break up the text. If you use a large font size and use design elements well (just as you would in a blog post), then you don’t need to stuff your ebook with pictures. Graphics used for the sake of it don’t add much to the reading experience, and finding or creating suitable images can use up a lot of your time.
When you’re looking for graphics, be mindful of copyright laws. If you’re using images from Flickr licensed under Creative Commons, make sure you credit and link to the owner in the ebook. If you have a small budget for the ebook, you might consider buying stock photos from istockphoto or fotolia.
You should get your graphics in place at this stage because you may want to change around some of the text to explain or to tie in with the images you’ve chosen.
Step 6: Redraft and Edit Your Text
You’ve got your first draft done – the hardest part’s over. Now it’s time to revise, edit and polish your ebook until it shines!
As with the first draft, you need to find some uninterrupted time and space for this: it’s all too easy to make mistakes or forget to remove those “[notes to self]” when you’re getting interrupted.
It also helps if you follow a step-by-step method, working on one aspect of the redrafting and editing throughout the whole document, rather than trying to perfect each page as you go along.
My process for redrafting and editing is as follows:
- Edit for Structure
- Edit to Add Quotes, Examples and Links
- Edit for Flow and Tone
First: Edit for Structure
Your first round of edits deal with the “big picture”: making sure that your chapters or sections are in the right order and cover all the points you wanted to make. Start at page one and read, fairly quickly, through the whole ebook. Look out for:
- Sections which would work better in a different order
- Places where you’ve repeated yourself in two different sections
- Sections which are too short (you may need to expand and give more detail)
- Sections which are too long (cut any waffle!)
Second: Edit to Add Quotes, Examples and Links
Once you’ve got the broad structure right, you can decide where best to enter quotes and examples. This will depend on the format of your ebook, but some things you may want to consider are:
- Using an example, quote, tips box or case study to break up a long section of text
- Creating a pattern: eg. opening or ending each section with a quote or case study
- Putting all the links at the end of each sections for easy reference (even if you also link in the body of the text)
You may find that you need to move around a few sentences or paragraphs in order to make the quote, example or case study work well.
Third: Edit for Flow and Tone
Rewrite any sentences which sound clumsy or which are ambiguous. You might like to try reading your ebook aloud: this often highlights any over-long or complicated sentences!
This is also a good point to check that you’ve used a consistent tone of voice throughout your ebook. Did you start off chatty but then drop into a more formal style? If you’re not a naturally humorous writer, make sure that any jokes or puns you’ve included really are funny.
Step 7: Format Your Ebook
Now that the text is complete, go through and get everything into the right format. Set all your headers and subheaders, making sure that you use the “Styles and Formatting” feature of Word (or your chosen word processing program). Don’t set the font size and style each heading manually. It’s not only inefficient, it stops you making an automatic table of contents – more on that in a moment!
(You might want to read up on Styles and Formatting, if you’re not sure how to use this feature.)
Choose a modern, easy-to-read font for your text and for your headings. Make both text and headings quite large – bigger than you’d use in a document for work or school. As I mentioned in Step 3, I like 14 pt Calibri (Word 2007) or 11 pt Verdana.
As well as formatting your section headings, you’ll also want to use some of the formatting options that you’re familiar with from blogging. This might include:
- Using bold to emphasise key points, and italics for emphasised words
- Setting out quotes in a different style (eg. indented, or in a box) from the main text
- Using a magazine-style “pull box” for quick tips
- Breaking some paragraphs into lists, to help keep the reader’s attention
You’ll also want to put a header or footer on each page with, at the very least, the page number. Consider including the title of the ebook in the header/footer on each page (in case readers print it out). You could also put your name, your copyright notice, or the URL of your blog.
Note that if you’re including a cover (and I recommend that you do), you can tell Word to use a different header and footer on the first page.
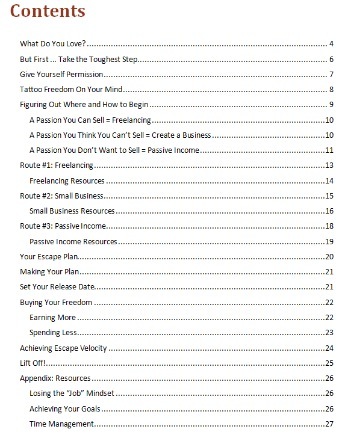
Step 8: Add a Table of Contents and Appendix
An easy way to make your ebook instantly stand out from the crowd is to add a table of contents and/or an appendix. Professional ebooks (and paper books!) have these – so why shouldn’t yours?
Table of Contents
If you’ve used Word’s Styles and Formatting feature to set up your headers, it’s really easy to add a table of contents. Just insert a new page at the start of your ebook, and (in Word 2007), go to the “References” tab, then click “Table of Contents” on the far left.
Word will automatically lay out the table with the headings, subheadings and page numbers. If you change the ebook after creating the table of contents, simply right-click on it and “update”. This is the table of contents from my ebook:
Appendix
In my ebook, I wanted to supply some ideas for further reading at the end. These didn’t fit with the body of the text, so I created an appendix.
Depending on your ebook’s subject, your appendix could be:
- A quick tutorial on something which some of your readers will understand but others won’t (you don’t want to put this in the middle of your ebook as those who “get it” will start skipping)
- A list of recommended resources, like websites, blogs, books, products, services…
- A “cheat sheet” for readers to print out – popular in technical fields
- A list of notes and references for each section – often in more scientific books
Creating an appendix is simply a matter of starting a new page and putting the header “Appendix” (or, if you want multiple appendices, “Appendix 1”, “Appendix 2” etc.)
Step 9: Create Your Front Cover – And a Graphic
All the hard work of writing and formatting the text is done: here’s the fun part – creating your ebook cover!
I’d recommend spending a couple of dollars when creating your cover. Look through istockphoto or fotolia for a great, eye-catching image. Ideally, you want something without too much detail (as you’ll be using a thumbnail of the cover pic on your blog, to advertise the ebook).
I’m no designer, and it took me some time to make a cover that didn’t look hopelessly amateur! You might want to enlist a friend with a good eye for design, though some quick tips are:
- Use a big, clear font for the title of your ebook
- Consider having a subtitle or strapline in a smaller font
- Stick to just two or three colours
- Come up with a few designs or layouts and pick the one you like best
Once you’ve put your cover in as the first page as your ebook, take a screenshot and save it as a .jpg. If you can afford to spend a bit more (currently $27), I highly recommend a piece of software called eCover Software Pro, which I’ve reviewed here. It allows you to “drop” that image onto a book-shaped template, so that it looks something like this:

It’s very straightforward and intuitive to use, and it’s a powerful way to send readers the signal that you’re a serious problogger.
Step 10: Convert Your Ebook to a PDF
When I first started creating ebooks, I tried out a lot of different free options for turning Word documents into PDF files. The problem was, they didn’t keep links unless the links were written out as a full URL – so www.aliventures.com would remain as a link, but Aliventures wouldn’t! This also meant that they didn’t keep in the links that “jump” the reader from the contents page to the entry that they’ve clicked on.
A few months ago, I bought version 8 of Adobe’s Acrobat software – which cost over $100. I realised that spending hours trying to put the links back in manually each time would cost me a lot more, in the long term. It is a big outlay when you’re starting out as a ProBlogger, so I’d recommend doing what I did – look on ebay for a slightly older version of Adobe (as I write this, 9 is the current version, so look for 8 or 7). This will be just as good for your purposes, and will cost a bit less than the latest.
You could also see if your workplace or college has Adobe Acrobat. Or ask on Twitter to see if a willing friend can convert it for you! (You’re welcome to send me a Tweet if I can lend a hand.)
The best free option I’ve used was pdf995, so if all else fails, give that a try!
Note: If you have Word 2007, you can use the “Publish as PDF” feature. I’ve not used this myself (since I have Adobe Acrobat) so I can’t vouch for how good it is or whether it will include all links. If anyone knows, do tell us in the comments!
Step 11: Final Proof-Read and Link Check
Once you’ve got your PDF file, go through and do one last check for typos. Try not to get tempted to do much editing at this stage … you could carry on tweaking for ever. Just check for anything that’s obviously wrong.
This is a good point to double-check that all the links are working – just in case anything hasn’t converted properly, or in case you put a link in wrong.
Step 12: Publish and Publicise
Publishing the ebook on your blog is easy, compared with all the work of creating it! You can either upload it using your blog software’s “upload” function (go to Media->Add New in Wordpress), or you can use an FTP program to do so.
Create a new post telling people about your ebook, using the cover image that you created (either with eCover Software Pro or as a “flat” looking image).
Then get the word out! Tweet about it, ask for retweets, send emails to blogger friends – though do make sure your ebook will be on-topic for their blog. You might even consider writing a press release to send to your local paper.
I decided to run a competition in connection with the free ebook launch, which helped to gather retweets and a bit of a “buzz”.
Step 13: Relax!
Finally, give yourself a well-earned break! Your ebook’s out there, and your blog’s getting a lot of new visitors. Get yourself a glass of wine, a beer or a mug of great coffee … and start thinking about your next ebook.
As well as writing ebooks, Ali Hale writes a blog on “getting more from life” at www.aliventures.com: you can get her twice-weekly posts straight to your feed reader.
Post from: Blog Tips at ProBlogger.
Thirteen Steps to Write and Publish a Free Ebook In Thirteen Hours


1 comment:
Now back replica bags started authoritative 'luggage' accoutrements and alms them for auction to the accumulation market, I accept been a fan of them; those getting accoutrements through which I acquisition a acceptable accommodation of stylishness and applied sturdiness.
Post a Comment